Photoshop Tips and Tricks #3: Multiplicity
Shortly after I wrote my first Photoshop tutorial, Broch sent me an e-mail with one line: “Quick question, exactly HOW do you do this in Photoshop???” The answer was simple enough. All you need is a tripod and, well, a camera.
Silly me. I don’t have a camera. I couldn’t very well show him how to do that, now can I? Of course I can. I have a digital crapera, which is just as good.
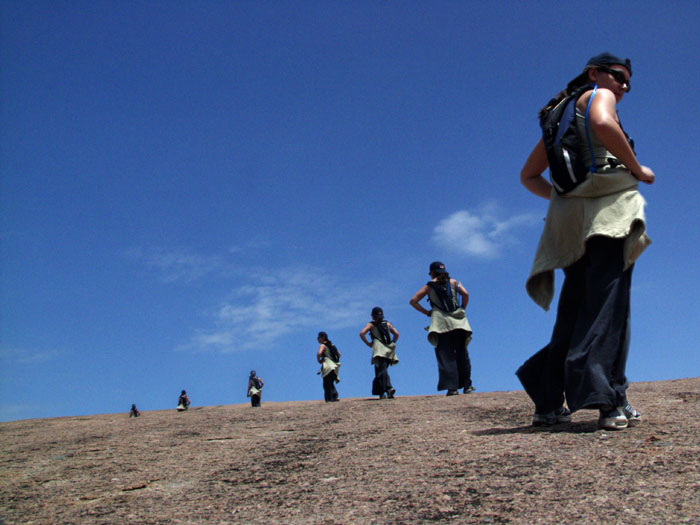
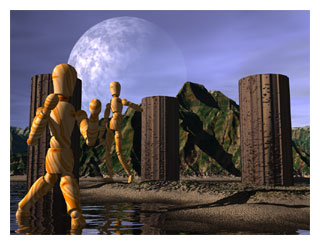
So I asked my friend Woody to model for me; we picked out a scenic spot over at the Carr-Alien Resort, and I took these fauxtos of him in various poses. I took care not to move the tripod or the crapera in between shots, and I took care to choose a spot void of wind and noticeable movement, so the only difference in each shot is Woody and his reflections or shadows.
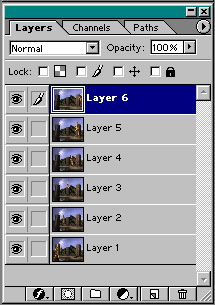
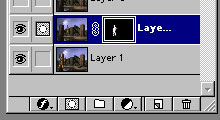
Next, I took all the images in Photoshop and placed them as individual layers in a single file. I simply dragged and dropped each image onto the first one while holding the Shift key to keep them all aligned properly. Here’s what my layer palette looked like:
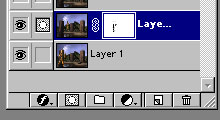
Then, I made only the bottom two images, Layers 1 and 2, visible. The rest I hid from view. I clicked on Layer 2 to work on it and created a mask for it by clicking on the mask icon at the bottom of the layer palette:
With the mask active (you’ll know it’s active if the mask icon, instead of the paintbrush icon, shows up next to the layer’s thumbnail), I took the Paintbrush tool (while leaving black as my foreground color) and painted directly on the second layer Woody, effectively masking him out. As I paint, the layer palette looks like this:
…and the actual image looks a bit like this:
When I completely painted Woody, his reflections and his shadows out (leaving the rest of the scenery alone), I hit Ctrl-I (or Command-I) to invert the mask, like so:
…which reveals the Woody I painted out and the layer beneath, like so:
How this works: anything white on the actual mask, which is to the right of the layer thumbnail, shows up, and anything black on the mask is “erased.”
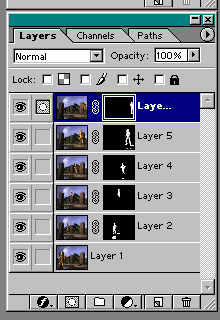
One by one, I worked on the other layers in the same fashion, creating masks for them, too, until my layer palette looked like this:
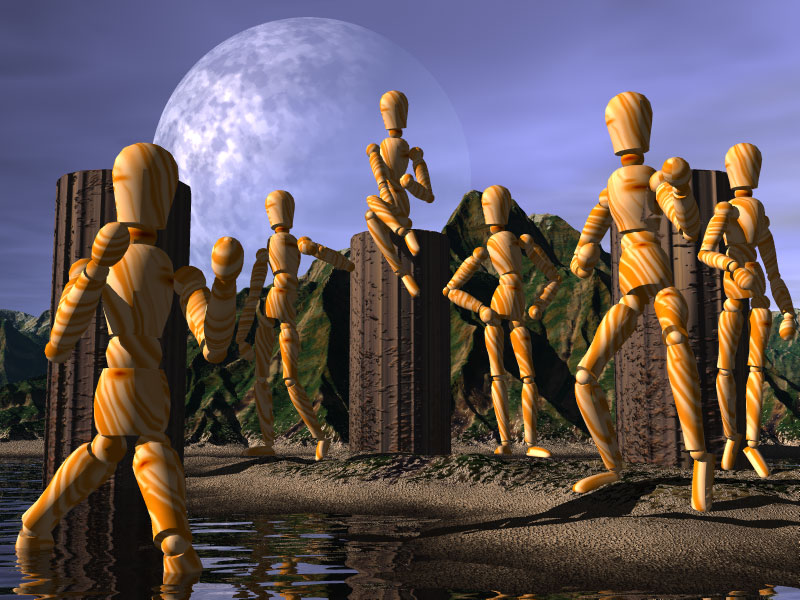
…and my image looked like this:
See? Really simple. My thanks go to Woody for being such a great model and to Broch for asking how to do this. If you have any more Photoshop questions, feel free to send them my way.
Share this post:
14 thoughts on “Photoshop Tips and Tricks #3: Multiplicity”
Thank you! I have always wondered about this one…. what a gift you are to all of us!
I like your style of explaining… even a layman can understand it. Excellent, April!
Get a book published.
Another great tutorial!
It almost makes me wish I had a copy of Photoshop at home. (almo$t) I wonder if the same results are easily accomplished with PaintShop Pro? *ponders*
Bravo! Impressive, very impressive and thank you for sharing. I will have to try that on a day I can devote lots of time.
Thanks April! You rock the world, ya know??? Have a beautiful Sunday, and get some sleep =-)
Thanks and welcome, everyone! 😀
Parl, Paint Shop Pro uses masks and layers, too. I haven’t worked in PSP in a long, long while, but you should definitely be able to do the same thing. 😉
amazing gal,truly amazing.
I agree, it is truly amazing and what a great artist April is and a great person for sharing with the rest of us.
Thanks, April! I really need to find me a copy of PS so I can start doing some of these things. You rock!
how to create a transperent water in photoshop
how to create a transperent water in photoshop
April, it’s also a great way to edit people ~out~ of a photo, say if you want an image of a statue in a park and a bunch of bozos keep walking in front of it and you can never get a clear shot.
Multiplicity image is a photography technique in which the same person is photographed from different point of view and directions and then the bunch of photographs are digitally re-mastered in Photoshop showing clones of the person doing different things all in one photo.
I find similiar tutorial about How To Create A Multiplicity Image using Photoshop… just for share maybe its usefull
http://photograpyreview.blogspot.com/2011/11/how-to-create-multiplicity-image-using.html
Thanks, Yorke. The video is kind of slow and boring, but essentially he uses the same techniques I did.
Comments are closed.