How to Make Stereograms, Part 2: Creating the Distance Mask Render
This week, you can get Bryce 5.0 for free at Daz3D, so I figure this is the best time to continue in this three-part tutorial.
The last time I talked about how to make stereograms, I detailed how to make a repeating background. Trust me, the repeating background is a crucial step—that’s the part that everyone can see. This time, we’re creating the part that people with “magic eyes” can see, the actual 3D part. We’re creating sort of an alpha mask image to determine what our 3D image looks like, where the white parts are closest to the eye and the black parts are farthest from the eye.
The first thing you need to do? Get a 3D program like Bryce. It doesn’t have to be Bryce, but Bryce is being offered for free right now, so it’s a pretty good candidate. Otherwise, you can also use Vue, 3D Studio Max, Lightwave, Maya, Carrara, or whatever else pleases your 3D fancy. Use Google to do your research if you must. It really doesn’t make much difference. Me? I’ve been using Bryce since before Corel and Daz3D bought it, back when it was a MetaCreations creation, so it’s my weapon of choice.
Second step, open the 3D program and choose a model for your 3D image. For this tutorial, I selected this shape, which is included in the existing Bryce presets:
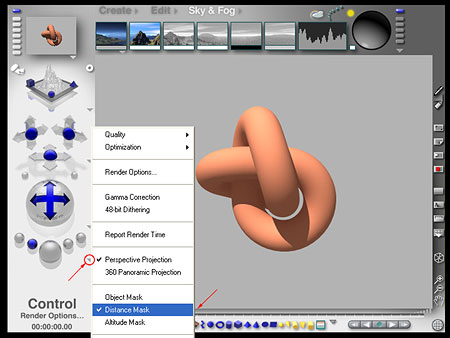
Third step, set the program up to render a distance mask. In Bryce, that means you’d select one of those gray upside-down triangles to open up a menu, and then you’d select—duh—Distance Mask, like so:
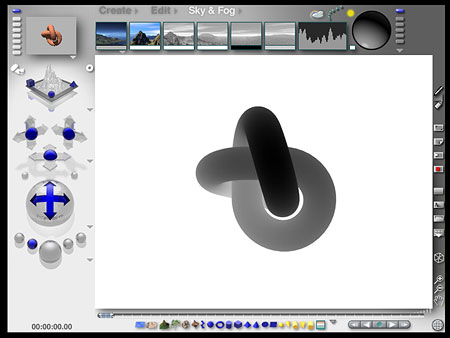
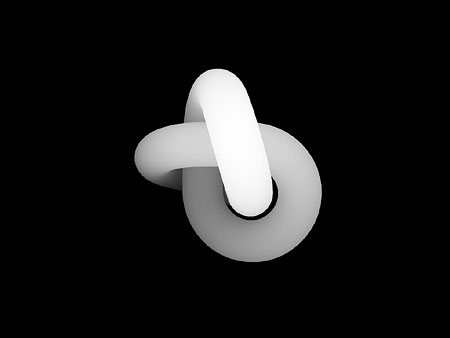
What this does is allow you to render your image in black, white, and shades of gray. In Bryce, the farthest distance is white, the nearest is black. The render will look something like this:
So fourth step? Render. This is what mine looked like:
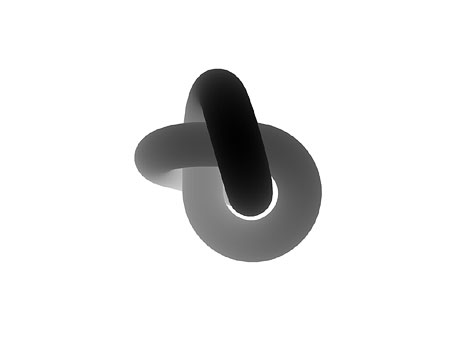
…except I rendered it bigger—a 1024 x 768 pixel size.
And fifth step? I took the image into Photoshop and inverted it so that the farthest is in black, and the closest is in white. I also increased the contrast a little so that the depth of the image would be more noticeable. This is what I got:
The final image is nice enough on its own, but when we go over the third part of this series, I’ll tell you how to use this or an image like this with a repeating background image to create your very own stereogram.
AND, for those of you who would rather not have to deal with a 3D program for this part in the tutorial, you can just as easily create a black and white image in any graphics program you like, so long as you know that the white parts will stick out in the stereogram while the black parts will be closest to the background.
And that, my friends, concludes part two.
Share this post: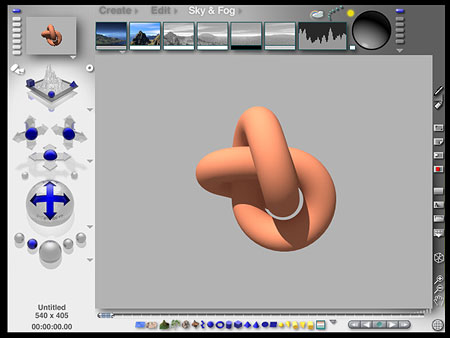
7 thoughts on “How to Make Stereograms, Part 2: Creating the Distance Mask Render”
Thank you, thank you, THANK YOU for posting part deux! (And for posting the Bryce freebie!) Can’t wait for the next installment.
Poser is free for a while, too. 🙂
Me just can’t WAIT for part 3 🙂
Thanks for the info on Bryce… me going to play with that until your part 3 comes out 🙂
THANKS 🙂
Thank you very much, it was really useful!
I am waiting with impatience for the part 3!
well now I am curious, please bring out nr 3 😀
Thanks
When are you coming out with step 3? *waits*
Thanks for these tutorials but when do you think you can get part three to us?
Comments are closed.