How I Fulfilled My Passionate Destiny
It’s been ages since I’ve posted a tutorial—since I’ve posted anything at all, actually; I’ve been busy doing book covers and various other things for e-publishers and authors. And now that I have more than a handful of samples to show, I figure I should do a half-assed tutorial and share one of my favorite covers—Passionate Destiny by Dee S. Knight.
Dee is a dream to work with. She provides a lot of book detail and cover ideas in her cover art requests, but she’s open and flexible as well, which I like because it gives me a lot of wiggle room when I work. She even let me read her manuscript, which is one of the cooler perks I have—especially considering how well she writes; Passionate Destiny has been getting some great reviews.
Anyway, Dee’s request read:
Large house, ghost. The house is a large wooden frame farmhouse with a front porch. The lawn leads from the house to a bluff overlooking a Virginia river, but the house is primary. I would like a ghostly figure of a woman in a long, flowing yellow dress with sprigs of flowers in front of steps and a porch. Dress circa 1860s.
Easy enough if I’m lucky, and I was. I found two really great stock photos around which I could build the illustration, and here they are:
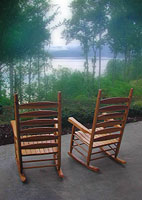

The only thing wrong with the stock photos were that they needed more, and I couldn’t find that “more” elsewhere. Somehow, I needed to add banisters, railings, and floorboards to the porch, and I didn’t want to ruin the photos by painting all this additional detail onto them by hand. So I opened up Bryce 3D and created a plane with a floorboard texture. Then I had H.E., who had years of experience as a professional photographer, help me figure out where to place the camera within my sparse 3D world so I could match the angle in the photo.
After that, I created a render … then I modelled the frame of the porch with Bryce primitives and rendered that as well.

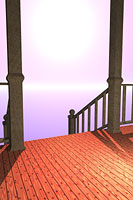
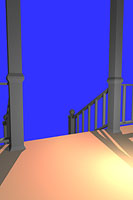
To make life easier on me, I also rendered an alpha mask to help me isolate the porch frame and an untextured image to help in adding the shadows. Notice that I kept the sun in my 3D world in relatively the same position as in the first stock photo.

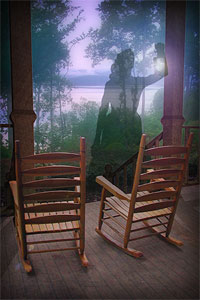
Next, I opened up Photoshop and composited the images with a dash of pepper and a touch of salt. And voila—this is what I got:
Next time, an actual tutorial. I promise!
Share this post:
One thought on “How I Fulfilled My Passionate Destiny”
Just read this after following the link on Rosity. Thanks for this, it’s very useful. If you ever write a full tut I’d love to read it. If you have time to mail me or site mail me at Renderosity that would be great 🙂 Those hard edged shadows are a real pain in bryce but soft shadows in the kind of scenes I build would take about three weeks to render! This gives me hope I might have a work around 🙂
Kathy
Comments are closed.