Photoshop Tips and Tricks #4: Realistic Preset Textures
Photoshop comes with preset textures like this one, called Snake Skin:
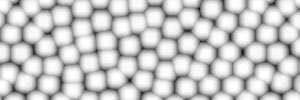
These grayscale PSD files are seamless patterns and don’t usually look like much, but that’s because they’re meant to be used in conjunction with the basic Photoshop tools. For instance, you can use the snake skin texture as a texture channel when rendering Lighting Effects (Filter > Render > Lighting Effects) and get this:
Or you can load the texture into the Texturizer (Filter > Texture > Texturizer…) and get this:
Either of those ways are cool enough by themselves, but for me, the results look a little harsh or flat—hey, I’m a perfectionist with a compulsive streak. So I came up with a way to give the texture a little more life.
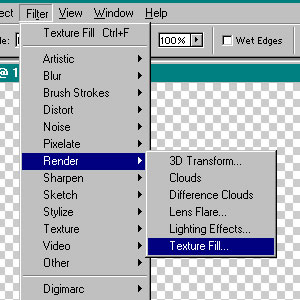
First, we begin with filling the entire canvas with the texture. You can do that by selecting Filter > Render > Texture Fill… and finding your way to the Photoshop preset textures folder, where the Snake Skin texture is hidden. The collection of textures will vary depending on the version of Photoshop.
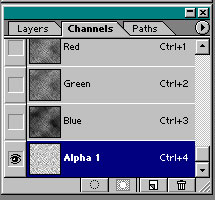
Once the canvas is filled with the texture, select all of it (Ctrl-A/Command-A) and copy (Ctrl-C/Command-C), then go to your Channels palette, create a new alpha channel (that’s the icon to the left of the trash can icon), and paste (Ctrl-V/Command-V).
Next, go back to the Layers palette and create a new layer. Select a few colors and randomly fill this layer with those colors. It doesn’t make sense now, but the randomness in color will give the end result a little more sense of realism. In this example, I chose two shades of brownish green and selected Filter > Render > Clouds.
Then set this layer to multiply, like so:
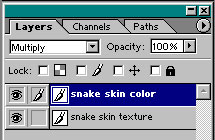
What you’ll get is a little something like this:
Looks more like peas in a pot at this point, but stick with me; it gets better. Merge the two layers into one and name it whatever you like so you can keep track of it in the following steps. I named mine “snake skin texture.”
Next, duplicate the layer twice (you can drag a layer onto the new layer icon to create another layer like it), like I did here:
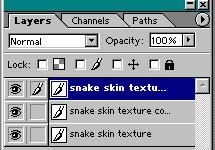
Hide the topmost copy from view and work on the first copy, like so:
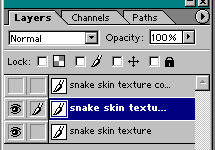
Now, on this layer, we’ll do a little magic. Select Filter > Render > Lighting Effects… and create a source of light from one angle, using the alpha channel you created earlier as a texture channel. If you click the image below, you’ll see the settings I used in mine, where my light source is coming from the bottom left.
And this is the result:
Then, and here’s the trick, select the highlights. You can do this by hitting Ctrl-Shift-Alt-~ (that last of the four keys is the tilde) on PC or Command-Shift-Option-~ on Mac. This is what it looks like when you select the highlights; you get crawling ants surrounding the lighter areas of the image:
At this point, if you hit Ctrl-J on the PC or Command-J on the Mac, you make a copy of your selection onto a new layer above this one (yeah, I know, Photoshop has a lot of really neat hidden shortcuts), like so:
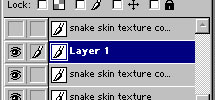
What I’ve done then is name this new layer “key light highlights,” while setting it at Lighten, and delete the layer below it, like so:
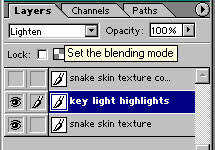
What you get is this:
It’s already pretty good, isn’t it? It looks like a photo of snake skin with a key light source coming from the bottom left. The only problem is that most photos usually have more than one light source.
This is where the second copy of the snake skin texture layer comes in. I do the same thing to it that I did to the first copy, except I use a different lighting angle and set the layer to Soft Light instead of Lighten.
What you get is this, snake skin with two light sources:
This is good enough to be a final image, but of course, with me being such a Photoshop-aholic, I couldn’t leave well enough alone. I thought that there was a little too much relief in this texture, so I flattened it just a little bit by adding another little layer above the texture layer and setting it to Soft Light.
And this, my friends, is my final (click to see entire image):
Realistic snake skin—a piece of cake. The proof is in the fact that I only just came up with this technique while trying to come up with a Photoshop tutorial that was -ahem- overdue for posting.
Update 2003.10.12, 2:00pm: here’s a version with patterned colors, like on a patterned snake…
Share this post:


11 thoughts on “Photoshop Tips and Tricks #4: Realistic Preset Textures”
Umm, is the image tag messed up? Not only can I not view the images, but the thumbnails aren’t leading to a larger image, either.
Oops, never mind. I think I’m having an internet lag.
Thanks for the excellent tutorial, April! 🙂
You caught me in the middle of updating. 🙂
Very cool. Makes me wish I had Photoshop.
Ever thought of starting your own classes for teaching Photoshop? You could hold a small workshop of sorts.
Not only are you a pro at Photoshop but your style of teaching is also fantastic.
very nicely done! I actually stumbled across your site looking for a way to select highlights in Photoshop, as my memory failed me… It just goes to show you never know what is around the corner. Snakes it seems. And hope. Thank you.
Nice job.
I was looking for this. You are even working with the colors I want:) I am going to make a snake skin background for my site. I might even make some nice bars and stuf once I make my patterns.
Thank you for the tutorial. I really suck at PhotoShop. I use Paint Shop Pro. I think this will be my first real attempt at the mighty PhotoShop.
Peace.
Nice this was what i looking for to make a 3d Dragon so i just changed it a litel bit Thx alot 🙂
Perfect Alien texture for a game that I am making. Thanks!!!
Hi, I very liked this tutorial. I’m looking for tutorials which teach me how to make a texture by photoshop.
Thanks!!!
Comments are closed.